Follow this guide if you have a deCONZ network running with a ConBee II or RaspBee II and want to migrate to Connect ZBT-1 and ZHA.
Note:
Not possible to migrate all settings and devices
This procedure only helps migrate basic network settings to Home Assistant Connect ZBT-1.
- Customizations like device names will be lost and automations will need to be updated.
- Most powered devices like light bulbs will be re-discovered over time (you can speed this up by rebooting the device) but your battery-powered devices may need to be re-joined to the network for the migration to complete.
- There is currently no migration path to migrate all settings and devices.
This migration includes the following steps:
- Prerequisites.
- Migrating the deCONZ network from the old adapter to ZHA.
- Migrating this ZHA network to Connect ZBT-1.
- Renaming the integration and reconfiguring automations.
Prerequisites
- a deCONZ network running with a ConBee II or RaspBee II.
- Home Assistant version 2025.10.1 or later.
- firmware version 26720700 or later on the Conbee/Raspbee adapter.
- Check the steps below to see how to check the version or update the deCONZ adapter.
Updating the deCONZ adapter
Step 1
Viewing the firmware version of the adapter
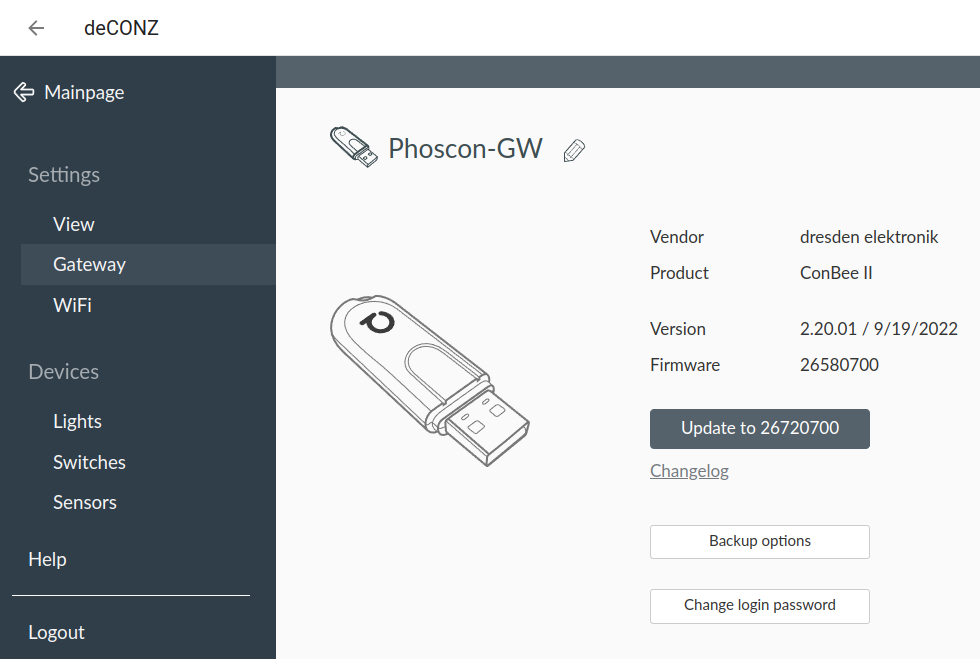
- In the deCONZ app, under Settings > Gateway, check the firmware version. It should be version 26720700 or newer.
- If the version is recent enough, skip the next two steps and continue with Step 4 (Stop the deCONZ add-on).
- If the version is not up-to-date, select Update to 26720700.
Step 2
Following the wizard

- Select Create backup and let the wizard guide you through the update process.
Step 3
Updating complete
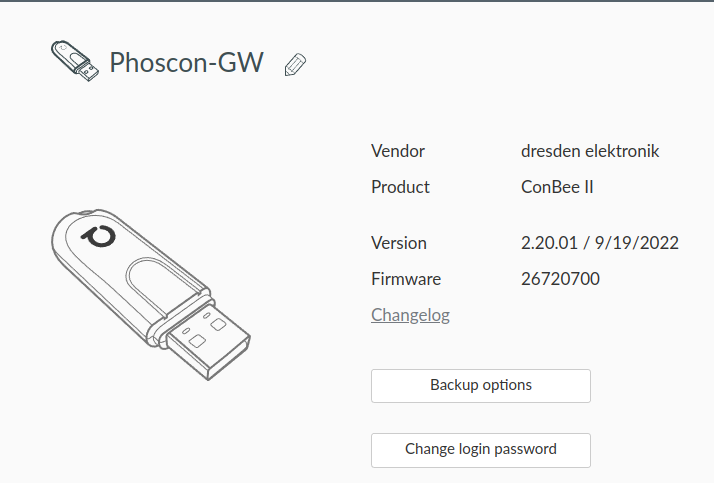
- Once the update is complete, you will see the new firmware version.
To migrate a deCONZ network from the old adapter to ZHA
Step 1
Stopping the deCONZ add-on
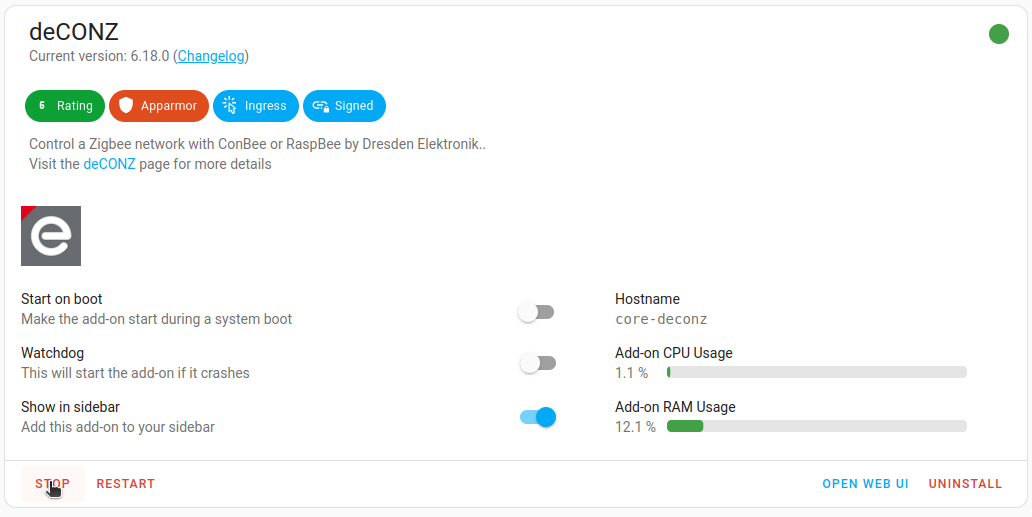
- In the deCONZ add-on, make sure the Start on boot option is disabled.
- Select Stop.
Step 2
Removing the deCONZ integration
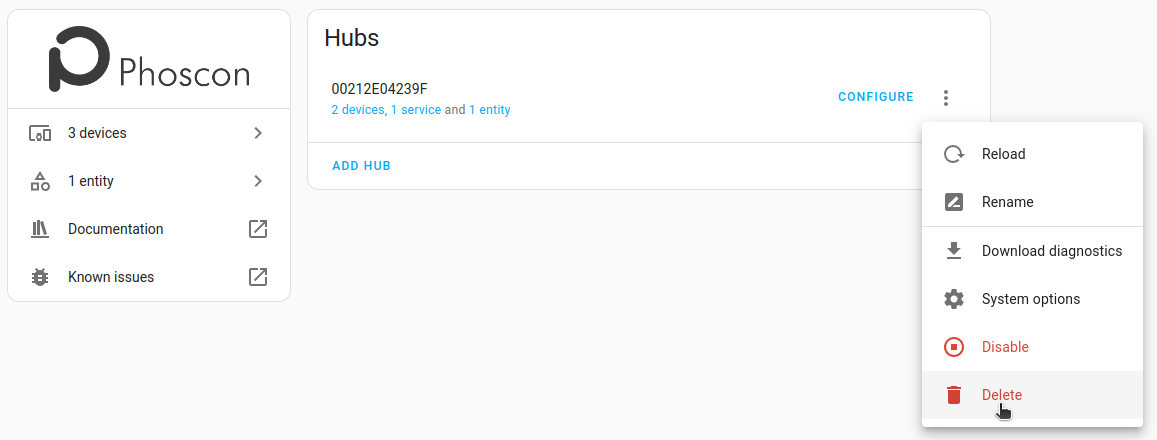
- Under Settings > Devices & services, select the deCONZ integration.
- Select the three dots menu and select Delete.
Step 3
Adding a new ZHA integration
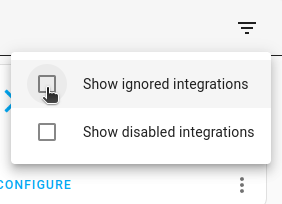
- In the top-right corner, make sure the checkboxes Show ignored integrations and Show disabled integrations are selected.
- Check if the ZHA integration shows up.
- If the ZHA integration does not show up, select Add integration, then select ZHA from the list.
Step 4
Add the Zigbee Home Automation integration
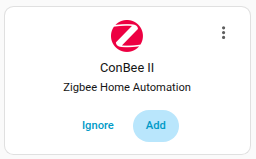
- Once the ZHA integration has detected ConBee II, select Add.
Step 5
Submit
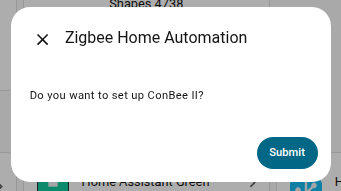
- To set up ConBee II as ZHA integration, select Submit.
Step 6
Choosing the Zigbee setup
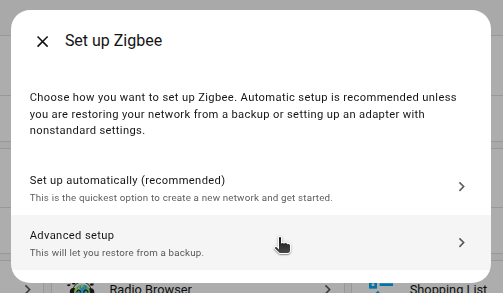
- Select Advanced setup.
Step 7
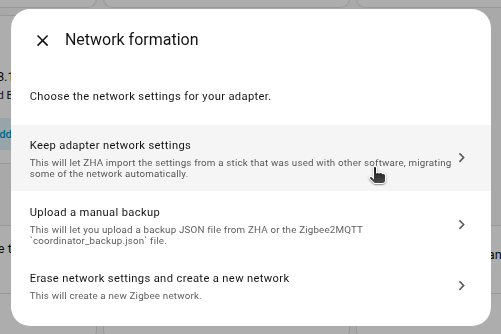
Choosing the network settings for your radio
-
Select Keep adapter network settings.
- This lets Zigbee Home Automation (ZHA) import settings from another device that was used with software other than ZHA.
- This way, some of the network settings can be migrated automatically.
-
Result:You can now start migrating the ZHA network as described below.
Step 8
Wait
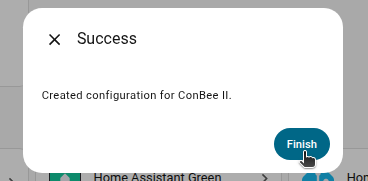
- Wait for the settings to be loaded.
- Once the Conbee/Raspbee adapter has been recognized as your Zigbee coordinator, select Finish.
Step 9
Wait
- Wait for the devices to rejoin the network
- Normally, powered devices rejoin within one hour.
- You may be able to accelerate that process by power-cycling devices.
- Your battery-powered devices may need to be re-joined to the network manually.
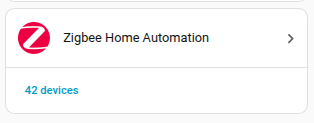
- Once the devices show up in the integration, select the integration.
To migrate the ZHA network to Connect ZBT-1
Step 1
Starting migration
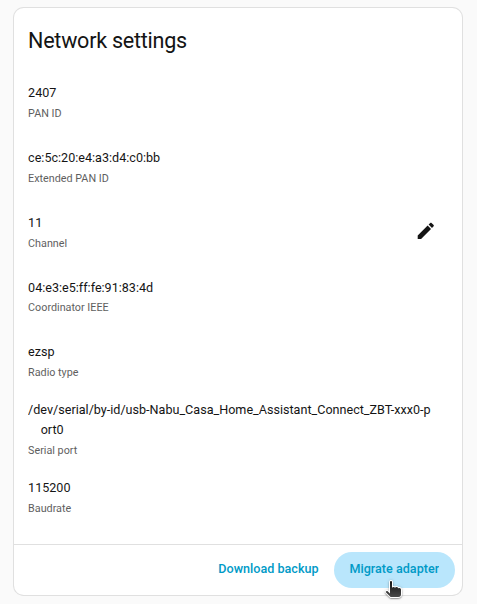
- Under Settings > Devices & services, select the ZHA integration, then select the cog wheel.
- Under Network settings add-on, select Migrate adapter.
Step 2
Adding an extension cable and the adapter
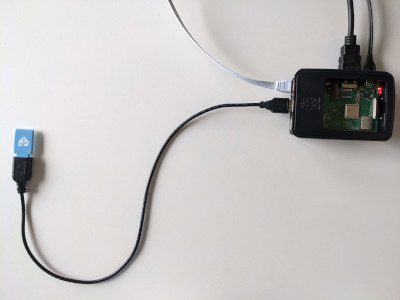
Notice
USB 3.0 ports and USB 3.0 drives can cause interference with 2.4 GHz protocols, including the ones provided by Home Assistant Connect ZBT-1.
- It is important to use the USB extension cable and to position the Home Assistant Connect ZBT-1 away from possible interference sources.
- This video shows the effect of interference.
- Plug the Home Assistant Connect ZBT-1 into the USB extension cable.
- Plug the extension cable into your Home Assistant instance.
- If you are using the standalone Home Assistant Container installation method, make sure Connect ZBT-1 is mapped to the container.
Step 3
Reconfiguring ZHA
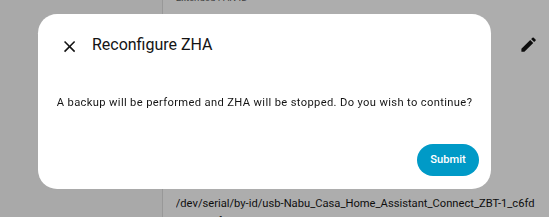
- To reconfigure ZHA, select Submit.
Step 4
Migrating adapter
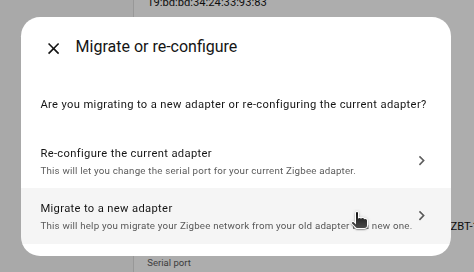
- Select Migrate to a new adapter.
Step 5
Choosing the port for the new adapter
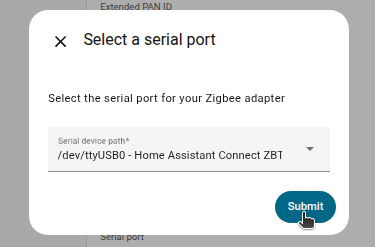
- Choose the serial port showing your new adapter and select Submit.
Step 6
Restoring a backup
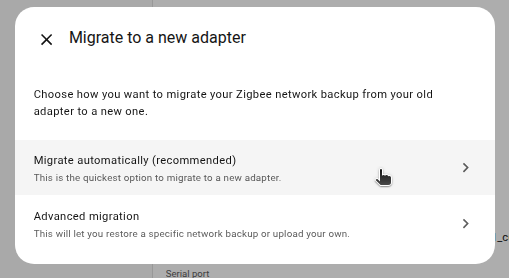
- To use the backup that was created during this migration, select Migrate automatically (recommended).
- This is the quickest way to complete the migration.
- To restore a specific, older backup, select Advanced migration instead.
- This will let you select a backup of your choice.
Step 7
Migration complete!
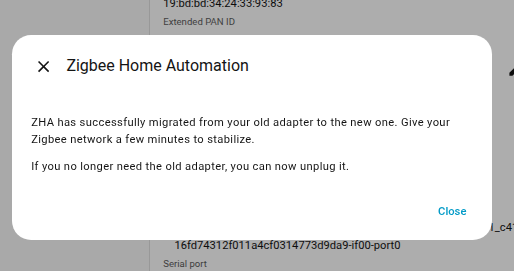
- The migration process is now complete.
- Info You won't be able to control the devices until they rejoin the network.
- Normally, they rejoin within one hour.
- You may be able to accelerate that process by power-cycling devices.
- You can now remove the old Zigbee adapter.
Renaming the integration and reconfiguring automations
Step 1
Renaming the ZHA integration
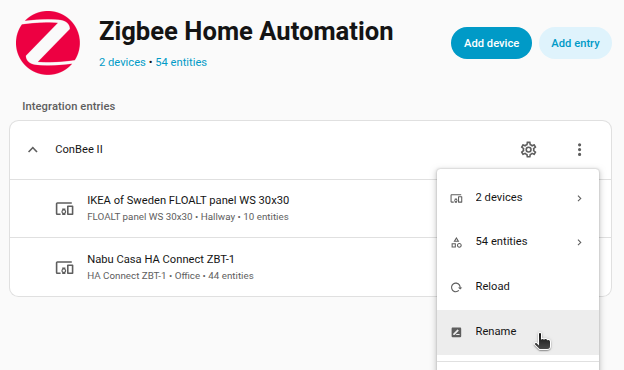
- To avoid confusion, rename the ZHA integration.
- Change the ZHA integration name to Connect ZBT-1.
Step 2
Reconfiguring automations and dashboards
- Info: All migrated devices have new entity IDs. This means you will need to manually reconfigure automations and dashboard cards.
- Info: The names that you manually assigned to your devices won't have been migrated. You will have to rename the devices again.